Overview
Microsoft Forms is a part of Office 365 that allows you to quickly and easily create custom quizzes, surveys, questionnaires, registrations and more. When you create a quiz or form, you can invite others to respond to it using any web browser, even on mobile devices. As results are submitted, you can use built-in analytics to evaluate responses. Form data can be easily exported to Excel for additional analysis.
Here is a quick rundown on how to configure your Forms to gather the information you need, when you need it.
Choose who you want to respond to your form
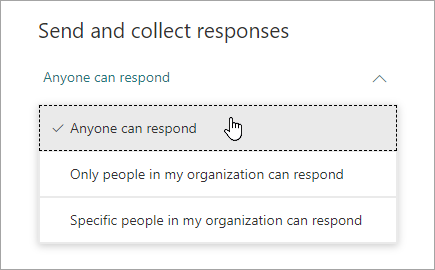
In the Share pane under Send and collect responses, select the drop-down list and choose from whom you want to collect responses.
-
Anyone can respond - Anyone inside or outside of your organization can submit responses to your form or quiz.
-
Only people in my organization can respond - Only people within your organization, signed in with a work or school account, can submit responses to your form or quiz.
-
Specific people in my organization can respond - Only people or groups in your organization that you specify can respond to your form.
Choose how you want to ask for responses
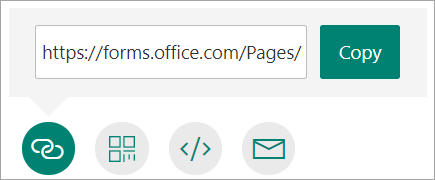

Select the Link button, and then click or tap Copy next to the text box that displays a web address. Copy and then paste this unique link wherever (e.g. a shared class notebook) your intended audience can see and click it to access your form or quiz.

Select the QR code button, and then click or tap the Download button, which will download your QR code as a .png file. Insert the .png wherever your intended audience can scan it with a QR code scanner, such as a mobile device, to access your form or quiz.

Select the Embed button, and then click or tap Copy. Paste this embed code into a web page, Sway, or a document.

Select the Email button. When your designated email application opens, add email addresses of the people for whom you intend the form. Microsoft Forms includes a brief note in the email body and a link to your form. You can customize the email message as you like.