NOTE: You must be connected to the College VPN in order to access College network drives from off-campus. If you are NOT connected and cannot access a network drive, please connect and try again before going through these steps.
If you are experiencing issues with network drives being inaccessible to you, and you have tried rerunning the mapping script, you may need to manually disconnect the drive and reconnect. Here's how.
Remove Network Drive using File Explorer

- Open File Explorer
- Click on This PC or Network
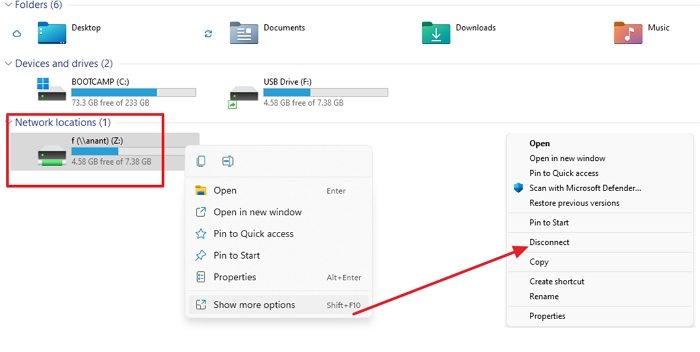
- Right-click on the Network Drive you want to remove
- Select Disconnect, and the network driver should disappear.
When doing this on Windows 11, you need to click on the Show More Options menu and choose disconnect.
Remove Network Drive using Windows Terminal or Command Prompt

- Open File Explorer and make a note of the drive letter you want to remove
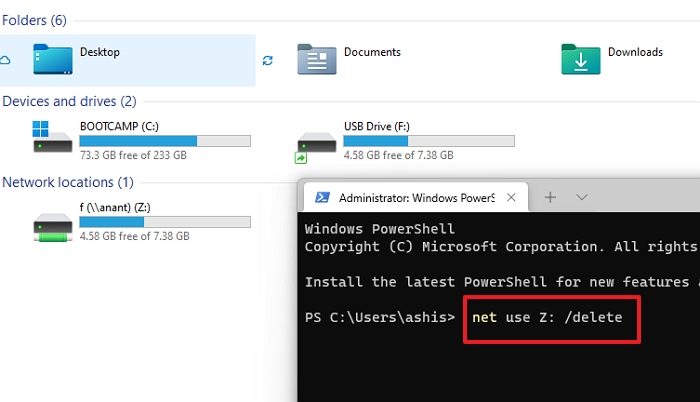
- Open Windows Terminal or Command Prompt with admin permission (Win + X)
- Type the following command and execute it:
net use Z: /delete
- Check File Explorer and the mapped network should not be there anymore.
Remove Network Drive using Registry

Before going ahead, make sure to either create a restore point or take a registry backup. If you accidentally delete something and the system becomes unusable, you can restore it to a working state.
- Open Run prompt, and type regedit
- Use Shift + Enter to launch the registry editor with admin permission
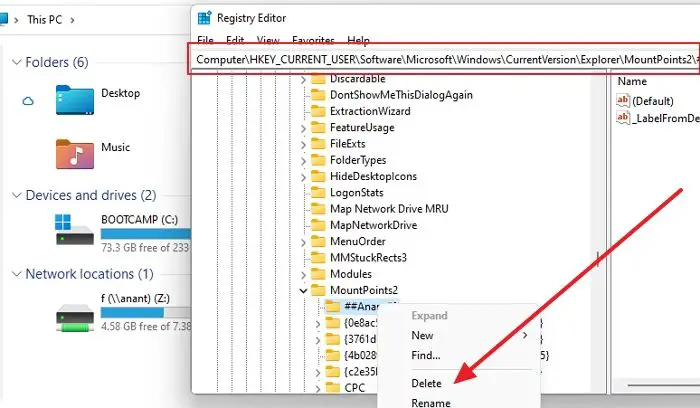
- Navigate to the following path
HKEY_CURRENT_USER\Software\Microsoft\Windows\CurrentVersion\Explorer\MountPoints2
This place holds all the mapped network entries, and you need to locate the open you want to remove. It will be available as ##Server_Name#Share_Name, which in this case is ##Anant#f.
4. Please right-click on the folder, and delete it.
5. Choose Yes to confirm
Refresh File Explorer, and the network driver should not be there anymore.
Clear Mapped Network Drive Cache
Windows maintains a cache for all connected network drives. It allows the OS to load them quickly without waiting. Follow this guide to remove the mapped network drive cache and refresh everything.