Overview
This is a generic set of instructions on installing a printer that is configured on our print server for your use on your Apple Mac OS-based computer.
Please note: For this to work, your Macintosh must be joined to the CEDARCREST domain and you must be logged in with a FalconNet username and password to the computer. If you are not, you will not be able to print via this method.
Use your Mac to print to a printer connected to a Windows computer
- Click System Settings
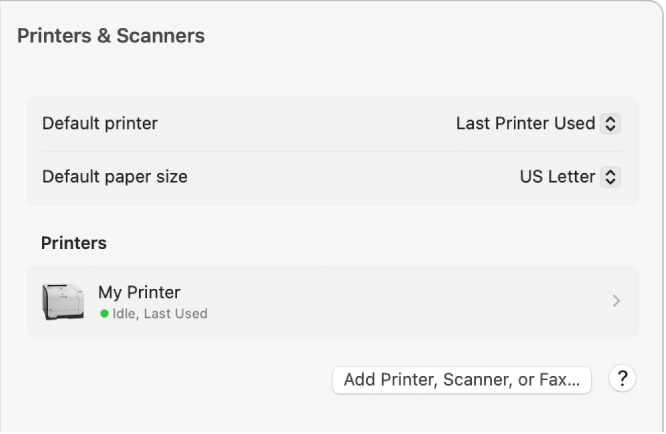
- Click Printers & Scanners
- Below the list of printers you already have installed, click Add Printer, Scanner, or Fax...
- This will bring the "Add Printer" dialog up and you will be on the "Default" button. Click the Windows button.
- Next, click CEDARCREST
- Then, click CCC-PAPERCUT2
- You should see a number of print queues in the list, select the printer you would like to connect to and click OK.
- It will prompt you for your user name and password. Input your FalconNet user id and password in this format: cedarcrest\username (example: cedarcrest\jrsmith) and then click OK.
- Follow the prompts to complete the installation
Update your printer software if your printer has a printing problem on Mac
Most printers are compatible with macOS. When you add a printer, macOS automatically uses AirPrint to connect to the printer. Check with your printer manufacturer to make sure you have the latest printing software for your printer.
If you can’t use a printer you already added, or you don’t see the options you want in the Print dialog, you can add the printer again with different settings or different printer software.
-
On your Mac, choose Apple menu
 > System Settings, then click Printers & Scanners
  in the sidebar. (You may have to scroll down.)
-
Control-click the printer in the list on the right, choose Remove Printer, then click Remove Printer.
-
Click the Add Printer, Scanner, or Fax button.
A dialog appears listing any IP, shared, and Open Directory printers on your local network. It may take a minute or two for your printer to appear.
-
Select your printer when it appears in the list, then do one of the following:
-
Use AirPrint: If you connected an AirPrint-enabled printer using a USB cable, click the Use pop-up menu, then choose AirPrint.
If AirPrint isn’t in the pop-up menu, your printer doesn’t support it.
-
Use printer software installed on your Mac: Click the Use pop-up menu, then choose Select Software.
-
Use printer software from a file on your Mac: Click the Use pop-up menu, then choose Other. Select the file, then click Add.